Monday, February 11, 2013

Finished Sea Guard and some Space Wolves

First up we have some photos of the finished Sea Guard unit (25 figures) and the hero.

I believe I have listed all the colors in previous posts, but if there is something I may have missed feel free to shout.

Basing: Sand and a patch of pebbles applied with Elmer's glue. After that dried, the sand was painted with Burnt Umber acrylic ink (made by Liquitex). Drybrush of Bestial Brown, followed by Bubonic Brown. Rocks were painted with Codex Grey and then given a brown wash. Edge of the base was painted with Scorched Brown, and then patches of static grass were added with super glue.

Scorched Brown reminds me of something... There's not a great equivalent to Scorched Brown in the new range of paints. Rhinox Hide is too dark. But, I found out a great mix: Rhinox Hide (about 3 parts) and one part Doombull Brown gets you a great replacement. So, if you find yourself needing to match models that were painted a while back, give that mix a shot. 

Anyway, on to the pics:


I've also been working on some Space Wolves. This army is being painted to "Level 2" standards (Most of the stuff on this blog is Level 3 or higher). Level 2 is a little bit simpler and quicker, which makes a painted army much more affordable. This Space Wolf army has a lot of figures, so it makes sense to have it at Level 2 instead (Characters will still be Level 3).

The Grey Hunter test figure:


And some Scouts:


 And here are 10 of the Blood Claws (The army will have about 30 I think... That's why there's three power fists in there).


The color recipes for Level 2 are nearly the same as with the Level 3 figure from the last post, just a little simpler and with less highlights. 

The armor, for example, is a basecoat of The Fang, followed by a wash of Agrax Earthshade. The Fang was used to touch up areas after the wash dried, and then Fang+Russ Grey was used for highlights. 

The Wolves are waiting on decals and basing. I like to do all of this at once, so I'll do that when I have some more figures finished up. 

Friday, January 11, 2013

Space Wolves Iron Priest

I painted up this Iron Priest the other day, as a sample model for a new customer.

I bought some of the Space Wolves colors from the new GW paint range, and I was finally able to try them out. The colors are pretty good. I was impressed with how well the basecoat (The Fang) covered over black primer. 


I tried some of the new metallic colors as well. I'm not as impressed with these. Boltgun Metal is still better, in my opinion. The pigment is much finer.

Anyway, here are some of the recipes: 

Armor: The Fang, wash Agrax Earthshade, highlight Fang, highlight 50/50 Fang/Russ Grey, highlight Russ Grey, highlight Fenrisian Grey. 

Silver: Leadbelcher, Earthshade, Nuln Oil, highlight Leadbelcher, highlight the edges/rivets with Runefang Steel. 

Leather: Rhinox Hide, Doombull Brown, Skrag Brown, Tau Light Ochre

Thursday, January 3, 2013

New Year, New Post

It's been almost a year since my last post. I'll admit, I kind of go through phases when it comes to this hobby.  I'm still painting. Some weeks much more than others... and some weeks not at all. One of my new years resolutions is to post more frequently. I have a few new commission projects in the works, so why don't you join me?

More High Elves:
These are the first five out of a 25-man regiment of Sea Guard.


 And we also have a hero armed with a bow...

Here are some of the colors I used: (I'm starting to run out of a lot of the old Games Workshop paints and I'm testing the waters with some of the new ones. I'll update with substitutions for older colors as the recipes change)

Metal: Basecoat with Chainmail. Black wash mixed with blue wash. Highlight Chainmail, and then highlight Mithril Silver on the edges.

Gold: Basecoat Brazen Brass (VMC), Brown wash, highlight with Shining Gold (VMC), highlight Shining Gold + Mithril Silver. Glaze over the gold areas with a mix of Sepia wash, water, and a tiny bit of yellow ink.

Hair: Basecoat 50/50 mix of Snakebite Leather/Zandri Dust. Sepia wash. Highlight with Zandri Dust, highlight with Bone.

White (Fabric) Basecoat Zandri Dust, highlight Ushabti Bone, highlight Screaming Skull, highlight Skull White.

White (Shields) Basecoat 50/50 Astronomican Grey/Skull White, shade with thinned Astronomican Grey. Highlight up to Skull White on the edges.

Red (Shields) Basecoat Mephiston Red, highlight Blood Red, highlight Fiery Orange.

Skin: Basecoat Tallarn Flesh. Flesh wash. Highlight Midlund Flesh (P3), highlight Midlund Flesh + Screaming Skull.

Leather: Basecoat Scorched Brown (My pot has nearly been depleted. The new "equivalent" aka Rhinox Hide is too dark. I need to come up with a good substitute quick. Any suggestions?), Shade with a black wash. Highlight Dark Flesh, highlight Skrag Brown, highlight Tau Light Ochre.


Feel free to post questions or drop me an email. I'm happy to answer.

Sunday, March 11, 2012

Grey Knights done and a Dark Elf Dragon

Hi all. Been a while since the last update. Things just seem to get busier and busier. My gallery and oil paintings have really been taking up just about all of my time. So, no time to make any tutorials... yet.

But I do have a lot of pictures of new figs. I'll post color recipes below each image


Gold: Calthan Brown, Devlan Mud (x2), Snakebite Leather, Bubonic Brown, Skull White
Steel: Adeptus Battlegrey, Badab Black, Codex Grey, Fortress Grey, Skull White,
Horns/Claws: Scorched Brown, Bestial Brown, Snakebite Leather, Bubonic Brown, Menoth White Base, Skull White
Black Scales: Chaos Black, 50/50 P3 Coal Black and Chaos Black, Coal Black, Coal Black + Fortress Grey
Purple: P3 Beaten Purple, Badab Black, Beaten Purple, BP+Skull White
Dark Grey Skin (dragon), Basecoat of 50/50 Chaos Black and Adeptus Battlegrey, highlight by adding in some Khemri Brown for a couple layers. Highlight that mix by adding in Fortress Grey.


I think I've already shared all the recipes for the Grey Knights. Though if you see something that I haven't shared before, feel free to ask. I'll be happy to answer.

Monday, February 6, 2012

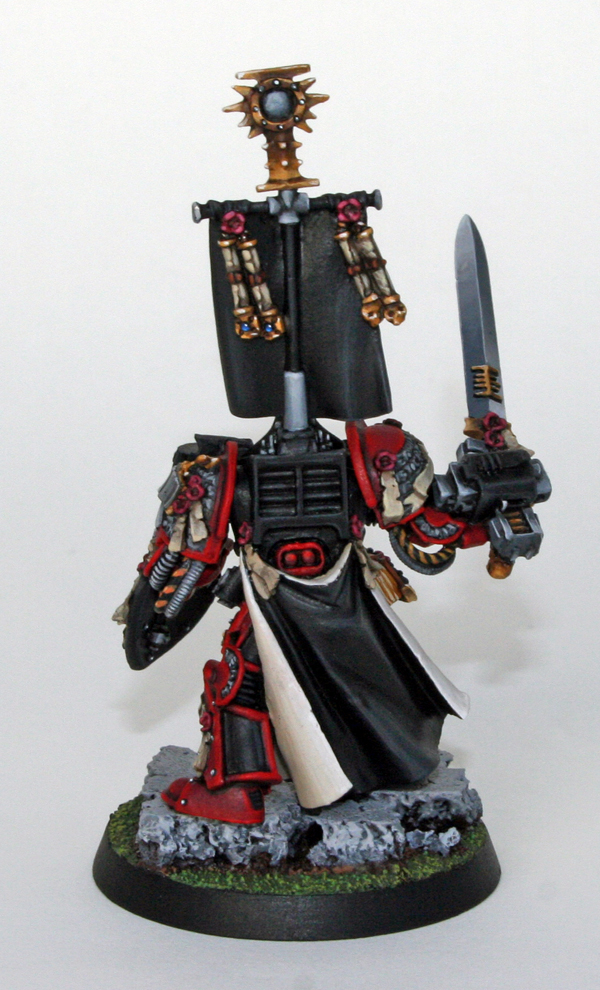
Dread Knight (alternate color scheme)

Hi all. Been very busy lately (though that seems to be usual for me).

I've got a Dread Knight painted for commission. The commission has one more of these, a rhino, and a character. When I start painting the next DK this week, I'm thinking about making a step-by-step tutorial for some of the NMM techniques.

I'm thinking two good subjects would be:
-Scratched armor
-Weathered/dirty steel (such as the exhaust pipes)

Anyway, on with the pics.


Here's some of the recipes if anyone is curious:

Gold: basecoat 50/50 Calthan Brown/Snakebite Leather, wash Devlan Mud, highlight Snakebite Leather, highlight up to Skull White.

Red Armor: basecoat Scab Red. Badab Black wash in the crevices. Highlight Scab Red+Blood Red. Final highlights of thinned Blood Red on the edges. Scratches/chips were basecoated with black, highlighted with Codex Grey, Fortress Grey, and then Skull White.

Steel (exhaust pipes) Basecoat Codex Grey, highlight Fortress Grey, highlight Skull White (sparingly). Dirt/smoke was added with a watered-down mix of Scorched Brown and Chaos Black. Begin at one of the holes in the pipe and move the brush upwards. Keep most of the dirt wash near the top. Final highlights/scratches were made with Fortress Grey and Skull White.

Base: Black undercoat. Heavy drybrush/basecoat of Scorched Brown. Rocks were heavily drybrushed with Adeptus Battlegrey, Codex Grey, and Fortress Grey. Dirt was drybrushed with Calthan Brown and Bubonic Brown. The green/grass areas were heavily drybrushed with Catachan Green, followed by Goblin Green, Camo Green, followed by a very light drybrush of Bubonic Brown. The rusted pieces of metal debris were painted with Scorched Brown, followed by washes/stippling of Vermin Brown and Blazing Orange. Scratches were added just like on the red armor.

If you'd like any other color recipes, please feel free to ask.


I've also started posting some more of my pottery up for sale on my Etsy shop. If you are in the market for some handmade ceramic stuff, please take a look:

http://www.etsy.com/shop/mattsterbenz

Thanks for reading. Until next time,

Wednesday, January 25, 2012

Elves and Dwarfs

Got a huge update. Things have been really busy lately. I've found a little bit of time to work on that Empire Captain, so there should be an update on him later on in the week. Unfortunately I have not had the time to make any tutorials but that should be changing pretty soon.

First up we have a Mage from the Island of Blood set. Remember that Phoenix Guard test figure? Same color scheme. Though I did fiddle around with the scheme a bit and added some white to it. The customer and I agree the color scheme looks a lot better now.


I ended up painting the mage in three parts. There's just too much intricate detail to paint in one piece.

Next up is the Phoenix Guard, with the improved color scheme. The images are really big this time. (Right click and open the link in a new tab/window to see it at full size).


And next up we have the group of 20 Dwarf Rangers. They all have the hammer/wing plastic shields from the warrior box sets.


More updates to come soon. For now I need to get some sleep! I don't think there's any new color recipes in this update, but if you are curious about what colors I used for anything, feel free to ask.

Monday, January 2, 2012

First mini of the new year.

A start, at least. After a year of painting only commissions and not finishing any figures for myself (I did start a couple projects but they got abandoned) I really intend on finishing this one. The past few years I have seen a decline in my desire to paint non-commission figures. Maybe this is the start of something bigger. Who knows, I may hit up the Golden Demons again. ;)


The first thing that you may notice on this guy is the undercoat. Normally I go with chaos black spray, but I figured I'd try something different. This is white primer along with a wash of Badab Black. Its sort of like the best of both worlds.

I am trying some more of those fabric textures again. I have promised a tutorial of this stuff in the past, and I do need to get around to finishing that too. Too many projects, too little time.

I gave the white fabric some purple shading. I figured that grey or brown shading would clash too much with the cloak or armor.

NMM steel recipe: Codex Grey, Fortress Grey, Menoth White Highlight, Morrow White, shading with a mix of Adeptus Battlegrey+Regal Blue, and shading with Chaos Black.

Thursday, December 22, 2011

2011 musings, and some painted miniatures

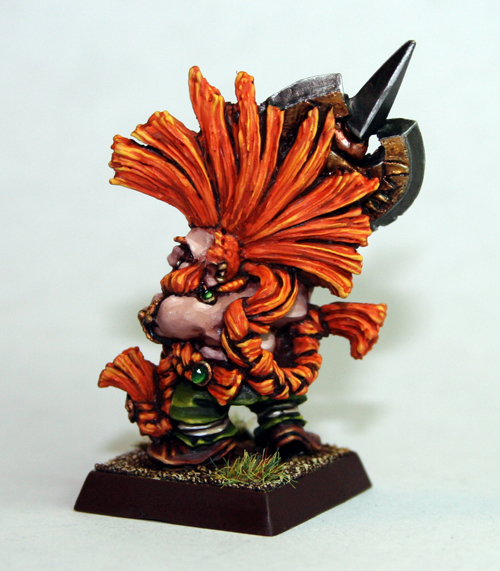
First up we have the finished Slayer Lord from last week's post:


I painted a test figure this evening for a High Elf commission. The color scheme is a sea-foam green and deep blue (GW Scaly Green and Regal Blue, each highlighted with white).


Well, 2011 is nearly over. Time has really flown by. It seems like just yesterday I started painting miniatures. In fact, it was about this time, 10 years ago, that I took up this hobby. I remember stumbling upon it at a local game store where I bought my Magic: the Gathering cards. I never thought something like this would ever end up making such a difference in my life. Reflecting back on everything that I have gained from these little metal toy soldiers really shocks me. It has made me a better painter. I learned a wealth of information about commissions and promoting myself as an artist. I have sustained a living doing something that I love. I have met countless incredible people in the gaming community. I could go on and on... but the bottom line is that all of this was possible with this hobby that I discovered by chance.

Anyway, I digress. I've been reflecting on everything that I have done in the past 350-odd days, and I decided to make a list of some of the accomplishments. In 2011 I:

-Graduated from college, with a 3.97 gpa (if I recall correctly I got one A- and one B+).
-I worked my ass off while going to college (15-18 credit hours per semester), painting miniatures to pay the bills, and I have remained debt-free.
-In April I drove to Sedona and painted landscapes for 3 days. I got some good paintings out of the trip and a load of great photos (my computer crashed and I lost them, however). I absolutely love landscape painting, and this trip among some other things really helped guide my oil paintings in the right direction.
-In June, I drove to Wisconsin for a wood kiln firing/interview for a pottery apprenticeship, and it was one of the most enjoyable things I have ever done. Between this trip and great ceramics professors at ASU I developed a really strong passion for pottery. I honestly can't make up my mind on what I want to go to grad school for... painting or ceramics.
-I decided that I am going to go to grad school. I don't have very much money but I won't let the cost of tuition hinder me. I'll just have to work a little harder and get some loans. The deadlines are in January, I believe, so I need to get on top of the application process right away.
-I made a website for my oil painting. (www.msterbenz.com) and I have taken that a lot more seriously.
-I became part of a brand new studio/gallery in Tempe, and I have started selling my oil paintings.
-Most of all, I have come to realize what my dreams are. Fine art (both oil painting and ceramics) is were I am headed. I want to teach college, and I need to go to grad school for that.

And as for miniatures, there was a thread on the CMON forums for keeping track of the year's painted figures. I think it's a great idea and I'm glad I posted in the thread. Here's the long list, copied from the forum:


6 Warmachine Cygnar Rangers
1 Cygnar tiny jack.
7 Warmachine Cygnar something or others. Gun mages? Not sure.
1 Space Wolves dreadnought.
1 Space Wolf Scout (test model for army)
1 FW Bloodthirster (Jan 23)

(UPDATE 7/17/11)
1 warmachine cygnar large jack
5 misc warmachine figs (don't know the names)
165 Skaven clanrats
15 gutter runners
2 warp lightning cannons
5 warlock engineers
1 grey seer
4 Skaven weapon teams
1 BA death company dread
1 BA librarian dread
5 BA terminators
1 sanguinary priest
5 ultramarines
10 night goblins
5 grey knight terminators
10 grey knight purifiers

(UPDATE 7/20/11)
1 forge world lord of change

(UPDATE 7/22/11)
1 Crowe
1 Draigo
1 GK Razorback
1 GK Dreadnought

(UPDATE 7/27/2011)
1 GK Dreadknight

(UPDATE 8/12/2011)
90 Skaven Clanrats
10 Giant Rats
2 Packmasters
2 Warpfire Throwers

(UPDATE 8/15/2011)
10 Blood Angels Death Company (with both sets of backpacks, magnetized)

(UPDATE 8/16/2011)
1 Grey Knight with Psycannon (Test figure for my personal army)

(UPDATE 10/12/2011)
5 LOTR army of the dead
1 Infinity Wolf guy
6 Misc Infinity figures
15 Dwarf Slayers
23 Dwarf Ironbreakers
1 Dwarf Ranger
1 Dwarf Hammerer

(UPDATE 10/28/2011)
6 Chaos Dwarfs (Greebo)
6 Hobgoblins
2 Bull Centaurs
3 Blood Bowl Tokens
1 Warmachine/Hordes Skorne Titan Bronzeback

(UPDATE 12/15/2011)
6 Warmachine/Hordes Skorne Cataphract Cetrati
1 more Warmachine/Hordes Skorne Titan
7 Misc. Skorne troops
20 Dwarf Longbeards
1 Blood Angels Sanguinor

(UPDATE 12/22/2011)
1 Dwarf Slayer Lord
1 High Elf Phoenix Guard test figure

According to my calculator that's 481 figures. All of those, besides the Skaven, were level 3 and competition quality paintjobs. I've still got another week left too. Maybe I'll get that unit of Dwarf Rangers done.


Hope everyone had a great 2011. See you next year,

-Matt