Sunday, October 6, 2013

Painting Ultramarines: A Step-By-Step Tutorial

I picked up one of the new Tactical Squad boxes, and I have to say I'm pretty impressed. I decided to pick up some and start an Ultramarines force (I've got a bunch of unpainted Space Marine stuff sitting in boxes anyway).

I decided to go with a clean, tabletop quality. I went with yellow on the shoulder pad trim instead of gold, because I just like the old school 2nd edition figures too much (I also have a massive amount of unpainted 2nd edition marines, which may show up on here at some point too).

I thought it might be a good idea to have a step-by-step tutorial on how I paint these guys. This will be the first of a couple installments. I don't have a ton of spare time, so it will have to happen over the course of a couple weeks.

Anyway, back on topic. Here's the Sergeant, which is also the test figure:


I also filed off the skull/details on the power fist, to give me more room for caution stripes (another 2nd edition thing I like). In the future, I think I may file off the wire thing on the bottom of the power fists as well.


After assembling, I gave the models a black spray undercoat. This was followed with a basecoat of Macragge Blue. Use a large brush and focus on making the basecoat even. Don't worry about making a mess at this stage. A couple thin coats is better than one thick coat.
Next, basecoat all the metal areas with Chainmail. (I think the new paint equivalent is Ironbreaker)
Next, use Nuln Oil to wash the metal areas and line in all of the cracks. Neatness isn't too important here. Just make sure the wash is placed in all the cracks.
Next, use a small amount of Agrax Earthshade on the metal areas. Then use Macragge Blue to touch up all the armor areas, making sure to avoid the cracks.
Lastly, use Ultramarines Blue to highlight all the edges. (I'm not sure of the new color equivalent. I'm sitting on 5 pots of the old stuff, so I have no need to buy it).


That's it for now. I'll update this with more as I can.

Skaven Screaming Bell


Friday, September 27, 2013

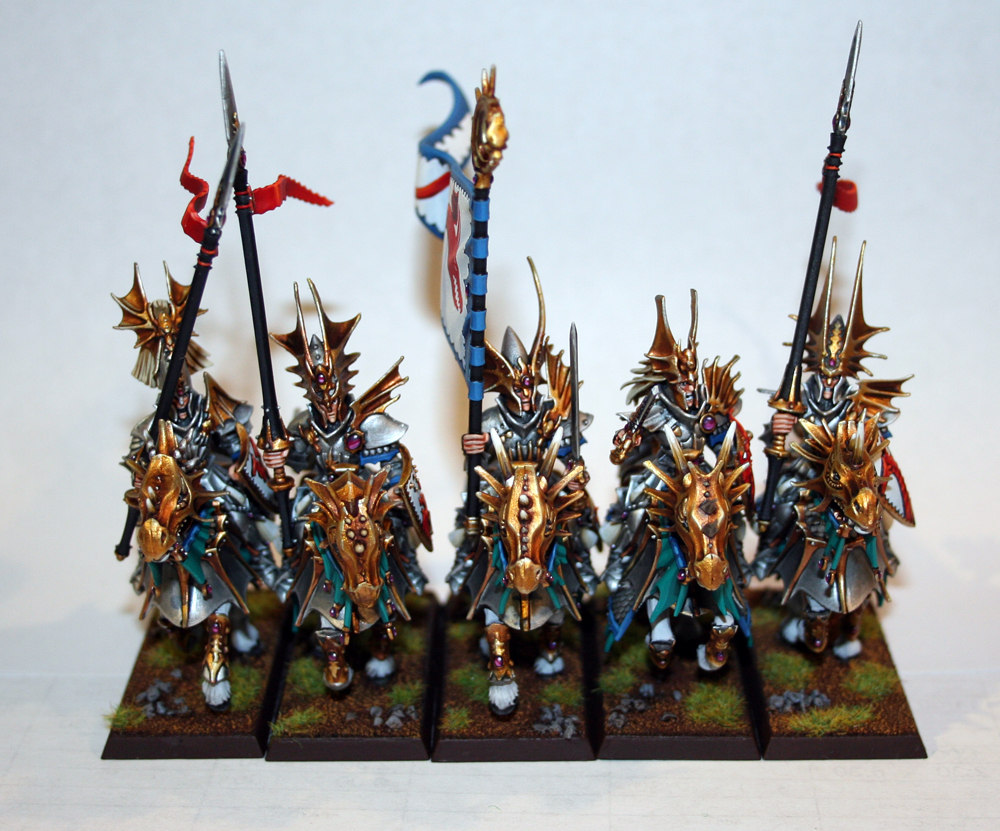
5 More Dragon Princes.. and how to ship them.

Here's the remaining 5 Dragon Princes. I converted one of them to have a horn strapped to his belt, just in case the client ever wants to use a musician in the unit.


The flags and spears in this kit are really fragile. Way too fragile for gaming, in my opinion. While they are great-looking models, it baffles me why a company would make gaming miniatures excessively delicate like these. (But that's a topic for another day). Since there are a lot of fragile areas, I took a little extra care in shipping. The first batch of 5 arrived across the country in perfect condition, so I think it might be worth sharing this method just in case anyone is curious (Unfortunately I didn't take photos of this process).

I began by carefully wrapping each figure in bubble wrap, putting more of the wrap near the base of the figures, and less around the spear/flag. After the wrap was taped, I slipped a 12-oz paper coffee cup over the top half of the model. I then took a long piece of tape and secured the wrapped model inside the cup.

I've used this cup method before when shipping figures with banners. It helps ensure that they don't get bent from the weight of anything else in the box, from being wrapped too tightly, or from whoever is unwrapping them later. Paper banners ship great this way too. I've also used cardboard to make a cone/cylinder type shape around really fragile areas.

Well, that's it for now. I've got finished photos of some Space Wolves vehicles to post sometime later this week. Wolf cavalry is nearly done, and I've got a Forge World Avatar on the chopping block as well. Stay tuned, and thanks for following.

Sunday, September 8, 2013

5 Finished Dragon Princes and some Space Wolf Long Fangs

First up we have 5 finished Dragon Princes. There are 5 more to come.


Next are two stragglers from the Sky Claw batch


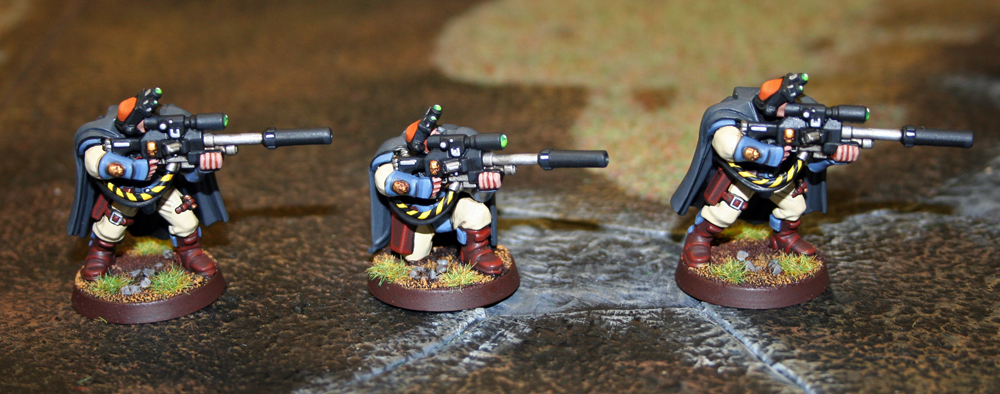
And last up is a few Long Fangs


I really liked how the Long Fangs turned out. Here's a couple new color recipes:

Shoulder pads:
Since I undercoated the models with black, I had to build up a white base on the shoulders. That was done with a few thin layers of Ceramite white. The goal is to get it as smooth as possible. The thinner the layers, the better. Once the base was sufficiently white, I painted it with a mix of white and Space Wolves Grey. Thinned Shadow Grey was used to line the crevices along the edge. Next, the black squad markings were drawn in, and then highlighted with a dark grey (I took a pot of Eshin Grey and added a few drops of black ink to darken it. It makes a great color to use as a highlight right on top of black). Once the dark grey highlight was added, I highlighted the white areas with pure white on the edges.

Caution stripes:
The caution striping on the multi-melta wires was first painted with several thin layers of Ceramite white. Once the base was good and solid, I painted a thin layer of Golden Yellow. Water it down and apply a couple coats if needed. Yellow can get chunky pretty easily. I highlighted the whole wire with a mix of Sunburst Yellow and white. Next came the black stripes. If the wire is really thick, I will try to twist the stripes around it. It can be a little difficult to draw it in correctly, but with some planning you can do it. This was done with some thinned black. Generally I won't highlight the black stripes, unless it's on a larger section of armor.

That's it for now. Up next: a Skaven Screaming Bell, 5 more Dragon Princes, a Space Wolves Vindicator, and two Land Raiders.