Sunday, March 8, 2015

The Four Forge World Greater Daemons


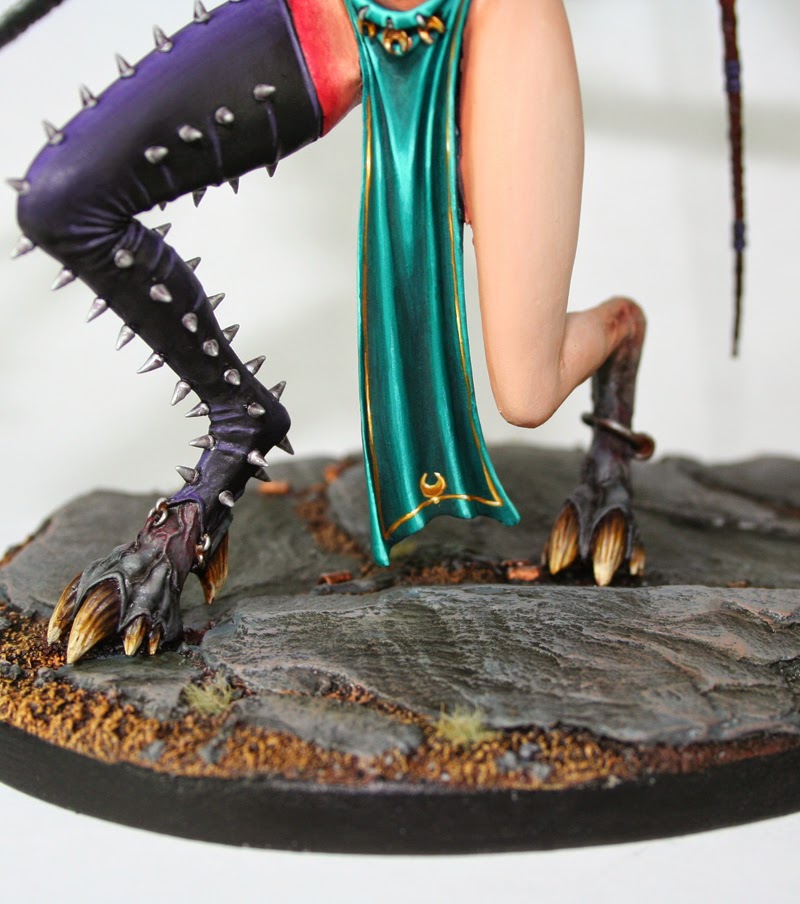
This Slaanesh Greater Daemon is the last of the four Forge World greater daemons, which I have painted over the past few years for the same person. I finished the Slaanesh daemon in November (Show's how much catch-up work I have to do on this blog). I'll include some images of the other three at the end as well.


Sadly my final photos of the Bloodthirster were lost, so all I have are some Work in Progress shots, taken shortly before it was finished:


The Lord of Change is my favorite of the four. We went with a really bright, different color scheme. 


And last up is the Great Unclean One. 


All in all this group of figures was over three years in the making. I'll have to see if I can get a picture of all four of them together. 


Monday, February 23, 2015

Creating a Press-Mold to Convert Shields

A customer of mine asked for me to give his dwarfs some shields with a bosses on them. Bosses are the round centers usually found in Viking shields. Since I couldn't readily find 40 plain shields with bosses on them, I decided to convert them with a press mold. This post will tell you just how to make one and start casting with it!


Press-Molds are a great, simple way of converting a lot of models in a short period of time. In essence, a blob of putty is stuck onto a relatively flat surface and "pressed" with an indented tool. When the tool (or Mold) is removed, you are left with the reverse impression on the model.

Unfortunately I don't have step-by-step photos of how to create the mold, but it is fairly simple to describe. To create the mold, I used a piece of plastic tube from an old ball point pen. The edges of this were sanded to make it as "sharp" as possible. I stuck a pea-sized amount of Green Stuff epoxy putty inside. Think in reverse when carving the mold (The cast left by the mold will be the reverse of whatever you carve). To create the main dome of the boss I pressed in the back end of a paint brush. The rivet impressions were created with a toothpick.

Pictured here is the finished press-mold and a cast shield.


-To begin, I took some of the shields from the Dwarf Warrior box and filed away the emblems.

-Stick a small piece of putty on the shield and form it into a cone-like shape. This will aid in casting. The more of these you make, the easier it will be to estimate the size of piece you will need.

-Wet (or lick) the mold and press firmly against the shield. Any extra putty will ooze out the sides. If you sharpened the edges of the tube, it should "cut" the extra putty off and it will be easy to remove. If you get good at estimating the proper amount of putty to begin with, you won't have any waste to cut off.

-Carefully remove the mold, pulling it straight off the piece (not at an angle). Repeat as needed. I got these shields done in less than an hour.




Sunday, February 15, 2015

Two Stormwolf ships and a Stormfang Gunship

Happy new year everyone. Better late than never, right? I've been neglecting my blog a bit, but still painting up a storm it would seem. I have a backlog of work to share, so without further ado:

Here are a few of the new Space Wolf ships. The Stormfang Gunship was painted back in December, and the other two Stormwolf ships were finished in January.


And for anyone interested, here are a few of the color recipes:

Hull: Basecoat The Fang (I use the spray from Games Workshop. It's very good). Shade with Earthshade in the cracks. Highlight Fang plus Russ Grey. Highlight Russ Grey on it's own, followed by Fenrisian Grey.

Yellow: Begin with several thinned layers of Ceramite White. Basecoat with a couple thin layers of Sunburst Yellow (The more thin layers, the smoother the coat will be. Smooth is better). Shade with a mixture of Golden Yellow, Yellow Ink, and a touch of Fiery Orange. Highlight with Sunburst Yellow mixed with white.

Silver: Basecoat Leadbelcher. Shade with Earthshade followed by Nuln Oil. Do a couple more layers of shading here and there with some thinned down Chaos Black. Highlight Leadbelcher. Highlight all the edges with Mithril Silver

A note on Mithril Silver: My original Mithril Silver ran out recently (The more recent paints before the new paint system. Hex bottles with black flip top caps). I mixed up a batch that is pretty darn close by using Valleo Game Color Silver and some White Scar. The white is necessary in the mixture. Try it out and compare, you'll see. I think the new metallic colors from GW are not as good as the old ones.

Tuesday, November 11, 2014

Skaven Warlord

Hi everyone. Up next is a Skaven Warlord with a converted weapon. The weapon is from the plastic Stormvermin box. I'll include some color recipes at the bottom.


Red Armor: Basecoat Mephiston Red, shade with earthshade wash (several layers). Highlight Mephiston Red, highlight Blood Red, highlight Blazing Orange, highlight Fiery Orange. Paint chips with black first, and then with Mithril Silver, leaving a thin line of black around the edge. 

Steel Blade: Basecoat Leadbelcher, shade with earthshade wash and black wash (several layers). Highlight with Leadbelcher. Scratches on the blade were painted with thinned down Chainmail. Highlight the edges with Mithril Silver. Glazes of Scorpion Green and Dark Angels Green were applied after. 

Friday, October 31, 2014

High Elves White Lions

There's been a bit of an absence here, but I've still been painting like mad. I've got a large backlog of work to share. First up is a unit of White Lions. I'll include some of the color recipes at the bottom.


White Fur: Basecoat Zandri Dust, highlight P3 Menoth White Base, highlight P3 Menoth White Highlight, highlight Ceramite White. Shade with a mixture of Seraphim Sepia and a little bit of Zandri Dust and water. 

Silver: Basecoat Chainmail. Shade with a mixture of Nuln Oil and blue wash (repeat the wash several times in select areas; especially the blades). Highlight Chainmail, highlight the edges with Mithril Silver.

Purple Gems: Basecoat black. Highlight Liche Purple, highlight Warlock Purple, highlight with a mix of Warlock Purple and Tentacle Pink, highlight with a mix of Tentacle Pink and a little white. Add white reflections on the top. 

Green cloth: Basecoat Scaly Green, highlight by adding in white. 

Blue cloth: (The old recipe was basecoat Regal Blue and highlight with white, but as I've run out of Regal Blue, I came up with a substitution) Basecoat Macragge Blue, shade with Azurman Blue wash. Highlight Macragge Blue, highlight Ultramarine Blue, highlight Ultramarine Blue plus white.